This guide covers backing up your database, restoring from backups, and managing data for migrations or cleanup.
Regular backups protect against data loss and enable safe testing.
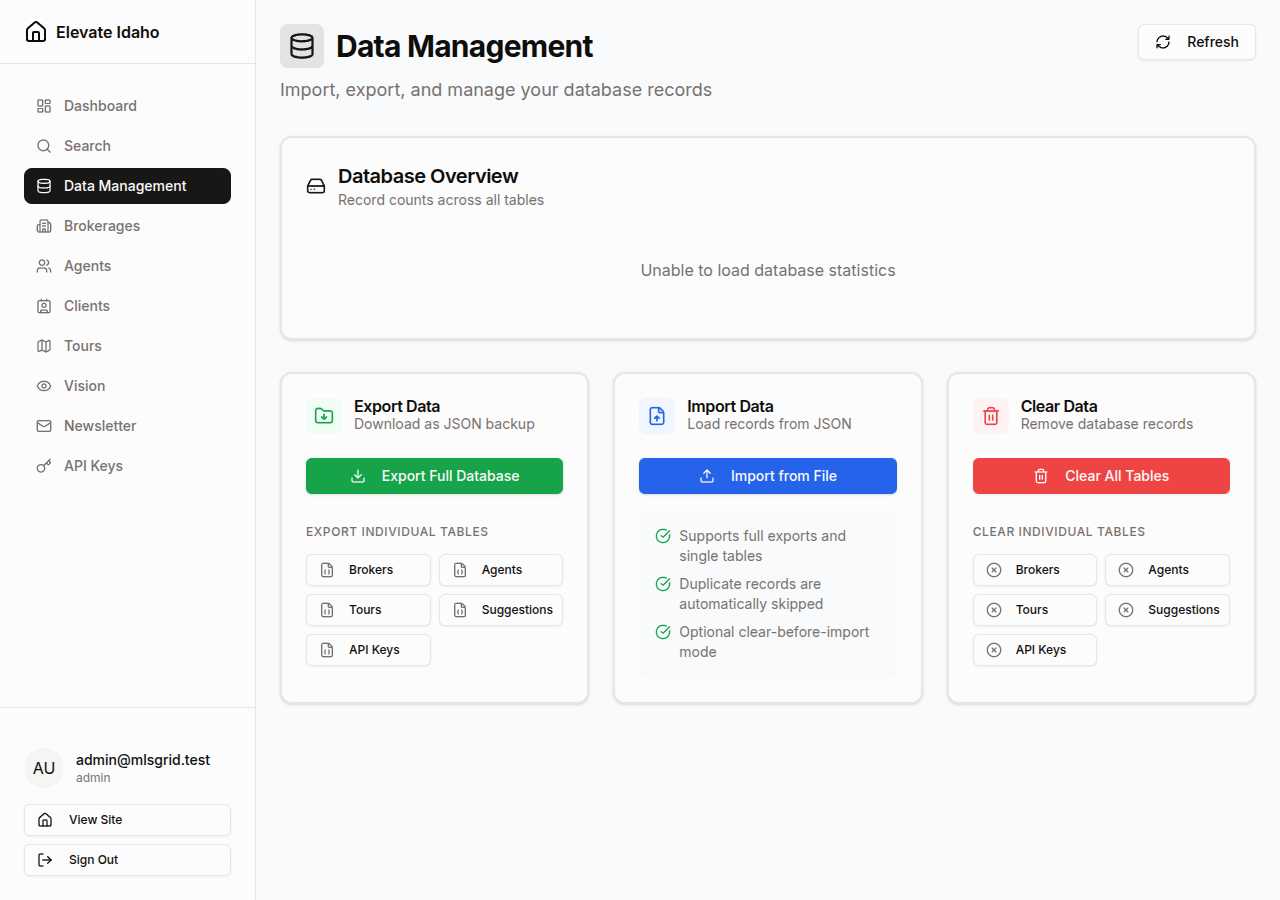
Export all tables in a single file:
- Navigate to Admin Dashboard → Data Management
- Click Export Full Database
- File downloads automatically as
mlsgrid-full-export-YYYY-MM-DD.json
- Store in a secure location outside the server
What’s included:
- Brokers
- Agents
- Tours
- Suggestions
- API Keys
- Metadata (export timestamp, table information)
Export specific tables when you only need partial data:
- Navigate to Admin Dashboard → Data Management
- Click the export button for the desired table:
- Export Brokers
- Export Agents
- Export Tours
- Export Suggestions
- Export API Keys
- File downloads as
mlsgrid-{table}-YYYY-MM-DD.json
When to use:
- Backing up before modifying specific records
- Sharing agent data with another admin
- Archiving old tour requests
Regular Schedule
Weekly full backups
Daily exports of critical tables (agents, brokers)
Secure Storage
Store backups outside the server
Use encrypted cloud storage or external drives
Test Restoration
Periodically verify backups work
Import into a test environment monthly
Retention Policy
Keep 4 weekly backups
Keep 12 monthly backups (first of each month)
Import previously exported data to restore records.
- Navigate to Admin Dashboard → Data Management
- Click Import from File
- Drag the backup JSON file into the upload zone (or click to browse)
- Import Target automatically detects “All Tables”
- Optional: Enable “Clear existing data” to replace all records
- Click Import Data
- Review the import summary when complete
- Navigate to Admin Dashboard → Data Management
- Click Import from File
- Select your single-table export file
- Import Target auto-detects the table (or select manually)
- Optional: Enable “Clear existing data” to replace records in that table only
- Click Import Data
Import behavior:
- Without “Clear existing data”: New records are added, duplicates are skipped
- With “Clear existing data”: Table is emptied, then all records from file are imported
After import completes, you’ll see a summary:
| Result Field | Description |
|---|
| Total Records Imported | Successfully added records |
| Records Skipped | Duplicates (records with existing IDs) |
| Errors Encountered | Failed imports (invalid data, constraint violations) |
| Processing Time | Duration of the import operation |
Moving data between environments (development, staging, production):
- Export from source:
- Export full database from the source environment
- Store the file securely
- Prepare target:
- Ensure target environment has the same schema version
- Back up any existing data in target (if needed)
- Import to target:
- Upload the export file
- Enable “Clear existing data” to replace all records
- Import data
- Verify:
- Check record counts match source
- Test key functionality (authentication, search, admin access)
- Review Recent Activity logs for errors
- Clean up:
- Delete export file from source (if sensitive)
- Document the migration
Moving only specific records (e.g., testing with subset of production data):
- Export from source:
- Export only the tables you need
- Import to target:
- Import each table file individually
- Do not enable “Clear existing data” (merge with existing records)
- Verify:
- Check that the specific records are present
- Test functionality involving those records
Remove records when you need to reset a table or the entire database.
- Navigate to Admin Dashboard → Data Management
- Scroll to Clear Data section
- Click the clear button for the desired table:
- Clear Brokers
- Clear Agents
- Clear Tours
- Clear Suggestions
- Clear API Keys
- Type the table name in UPPERCASE to confirm (e.g.,
AGENTS)
- Click Confirm
Complete database reset (use with extreme caution):
- Export a full backup first (mandatory)
- Navigate to Admin Dashboard → Data Management
- Click Clear All Tables
- Type
DELETE to confirm
- Click Confirm
- All records in all tables are permanently deleted
When to use:
- Resetting a development environment
- Starting fresh after a test migration
- Clearing corrupted data before re-import
Never use in production unless you have a verified backup and a disaster recovery plan.
Cause: The file is corrupted or not valid JSON
Solution:
- Open the file in a text editor
- Verify it starts with
{ or [ and ends with } or ]
- Use a JSON validator (e.g., jsonlint.com) to check syntax
- If corrupted, restore from a backup of the backup
Cause: Data format doesn’t match current schema
Solutions:
- Verify the export came from a compatible version
- Check for missing required fields in the data
- Review database migrations (schema may have changed)
- If schema changed, manually edit the JSON to add missing fields
Cause: Authentication issue or API service down
Solutions:
- Verify you’re logged in as an admin
- Check Dashboard → API Services for service health
- Try clicking the Refresh button
- If still failing, check browser console for errors
- Reload the page
Cause: Incorrect confirmation text
Solutions:
- For individual tables, type the table name in UPPERCASE exactly (e.g.,
AGENTS not agents)
- For full database clear, type
DELETE exactly (not delete or Delete)
- Copy and paste from the prompt if uncertain
Updating specific records without clearing everything:
- Export the table containing records to update
- Edit the JSON file:
- Modify the specific records you want to change
- Keep IDs the same (so they update existing records)
- Import the file without “Clear existing data”
- Records with matching IDs are updated, others are skipped
Combining data from different exports:
- Export from source A (e.g., staging)
- Export from source B (e.g., production)
- Import source A into target
- Import source B into target without “Clear existing data”
- Duplicates (same IDs) are skipped, unique records are added
- Review record counts to verify expected totals